Sunday, February 1, 2009

Baby Booties - Easy


THESE BOOTIES ARE FOR A BABY WHOSE FOOT MEASURES 3 to 3-1/4" INCHES LONG.
I've always had trouble making booties because the patterns I have are so complicated.
I hope this pattern makes crocheting booties more enjoyable for you :o)

MATERIALS:

Hook: Size G

Yarn: Chenille Sensations

Stitches used: ch, sl st, sc, sc dec, hdc.

Difficulty: EASY/MEDIUM


RND 1: Ch 16, join to form a ring (being careful not to twist the chain). Ch 1, sc in same ch as joining, sc in next 15 ch. Join with sl st in 1st sc made.

RND 2: Ch 1, sc in each of next 16 sc. -Place Marker-

RND 3: Rep Rnd 2.

RND 4: Ch 1, Do Not Turn, sc in next 8 sc.

RND 5: Ch 1, turn, sc in next 8 sc, sl st in next st on rnd 4.

RND 6: Ch 1, turn, sl st in same st, sc in next st, hdc in next 6 sts, sc in next st, sl st in next st on rnd 4.

RND 7: Ch 1, turn, sl st in same st, sc in next st, hdc in next 7 sts, sc in next st, sl st in next st on rnd 4.

RND 8: Ch 1, turn, sl st in same st, sc in next st, hdc in next 8 sts, sc in next st, sl st in next st on rnd 4.

RND 9: Ch 1, turn, sl st in same st, sc in next st, hdc in next 9 sts, sc in next st, sl st in next st on rnd 4.

RND 10: Ch 1, turn, sl st in same st, sc in next st, hdc in next 10 sts, sc in next st, sl st in next st on rnd 4.

RND 11: Ch 1, Do Not Turn, sc in each st around. -Place Marker- Do not join the rnd, continue working a continuous round....

RNDS 12-15: Sc in each st around. -Place Marker-

RND 16: * Sc dec over next 2 sts. Repeat from * around. -Place Marker-

Turn bootie inside out. Holding top and bottom of the toe together, sl st the corresponding stitches together to close the toe.
Fasten off and weave in the yarn tail. Turn bootie inside out again.

Attach yarn to any st on the top of the bootie. Sc in same sp as joining. * ch 3, sc in next st. Repeat from * around.

FASTEN OFF

WEAVE IN ENDS

TIE STRING: Cut a piece of chenille in the same or a contrasting color and weave through the top of the bootie (see photo) and tie a bow in the front. You can also use ribbon for this.


Saturday, January 31, 2009

Prairie Star Afghan LW1295


Prairie Star Afghan LW1295


Advanced experience & patience required.

Afghan measures approximately 54" x 77".

Red Heart® Super Saver®: 6 Ounces 378 Claret CA, 11 ounces 303 Painted Desert Print CB, 5 ounces 633 Dark Sage CE, 15 ounces 316 Soft White CF.

Red Heart® Fiesta®: 14 Ounces 6013 Wheat CC, 7 ounces 6631 Light Sage CD.

Crochet Hook: U.S. Size 1-9 [5.5mm].
Yarn needle.

GAUGE: Motif measures 4 1/4" x 6 3/4" before joining. CHECK YOUR GAUGE. Use any size hook to obtain the gauge.

NOTE: AFTER THE FIRST MOTIF, ALL OTHERS ARE JOINED WHILE WORKING RND3.

NOTE: Work and join center six CA motifs first, then work outward following diagram.


FIRST MOTIF: With CA, ch 4; join with a sl st to form a ring. Rnd 1: Ch 1, [sc, hdc, dc, tr, ch 3, tr, dc, hdc] twice all in ring; join with a sl st to first sc. Rnd 2: Ch 5, dc in sc, * dc in next 3 sts, (3 dc, ch 4,3 dc) all in ch-3 sp, dc in next 3 sts **, (dc, ch 2, dc) all in next sc; rep from * to **; join to 3rd ch of ch-5.

Rnd 3 (See Note): Ch 3, * (dc, ch 3, dc) all in ch2 sp, dc in next 2 dc, ch 1, skip next dc, dc in next 3 dc, ch 1, skip next dc, (3 dc, ch 5, 3 dc) all in ch-4 sp, ch 1, skip next dc, dc in next 3 dc, ch 1, skip next dc **, dc in next 2 dc; rep from * to **; dc in last dc; join to top of ch-3. Fasten off.

2ND MOTIF: With CA, work Rnds 1 and 2 same as for first motif. Rnd 3: Ch 3, dc in ch-2 sp; ch 1, with wrong sides together sc in ch-3 sp on first motif, ch 1, dc in same ch-2 sp on 2nd motif, dc in next 2 dc; sc in next ch-1 sp, skip next dc on motif in progress - join made; dc in next 3 dc, join, 3 dc in ch-4 sp, ch 2, sc in ch-5 sp on first motif, ch 2, 3 dc in same ch-4 sp on 2nd motif; complete same as first motif - 1 side joined.

NOTE: Check motif placement carefully. Some motifs will be joined beginning at a ch-5 sp. Some motifs will join a ch-3 sp to a ch-5 sp.

Following diagram, join all motifs in this manner: sc in a corresponding sp of a completed motif (the sc replaces one chain stitch on the motif in progress). Where 3, 4, or 6 points come together, join at points by sc into the sc of a previous joining.

HALF MOTIF: Ch 4; join with a sl st to form a ring. Row 1 (Right Side): Ch 1, (sc, hdc, dc, tr, ch 3, tr, dc, hdc, sc) all in ring; do not join; turn. Row 2: Ch 3, dc in first 4 sts, (3 dc, ch 4, 3 dc) all in ch-3 sp, dc in next 3 sts, 2 dc in last sc; turn. Row 3-Joining Row: Ch 3, sc in ch-sp on completed motif, ch 1, dc in first 3 dc, join, dc in next 3 dc, join, 3 dc in ch-4 sp, ch 2, sc in sc of previous joining, ch 2, 3 dc in same ch-4 sp, join to next motif, dc in next 3 dc, join, dc in next 2 dc, dc in top of ch-3, ch 1, sc in ch-sp on completed motif, ch 3, sl st in top of ch-3 of Row 2. Fasten off.

EDGING-Rnd 1: With right side facing, attach CE in any st; ch 1, work 1 rnd sc evenly around, increasing at outer points and decreasing at inner points to keep work flat; join to first sc. Rnd 2: Ch 3, work 1 rnd dc, increasing and decreasing at points as before to keep work flat; join to top of ch-3. Fasten off. Weave in ends.

ABBREVIATIONS: ch = chain; dc = double crochet; hdc = half double crochet: mm = millimeters; rep = repeat: sc: = single crochet

Thursday, January 15, 2009

Easy Breasy Shell Baby Afghan


I figured I would share a really simple pattern that has beautiful affects. You can do so many different things with this pattern. So please have fun and get creative! If you decide to make an afghan from my patterns please feel free to comment with a photo of your creation if you can!

Materials Used In The Example
About 18 oz. Red Heart Soft Baby (sport weight) in Color 7951 Angel Print
U.S. size E hook

Width = 26 1/2 inches (before edging is added)
Length = Your Choice. Instructions are given for repeating the pattern rows to achieve length desired. 36 inches is an average length but your blanket can be shorter or longer, as desired.

Gauge With Sport Weight Yarn and Size E Hook: 1 shell = 1 inch, at widest point, 1 cluster = 1 inch, at widest point; 4 rows = 1 3/4 inches (Gauge is not crucial to this project ... the sizes of baby blankets vary. Relax and enjoy the crocheting without overly worrying about getting an exact qauge.)

Starting Chain: Chain 138.

Row 1: Single crochet in 2nd chain from hook, single crochet in each chain across. (137 sc)


Abbreviations: ch = chain, dc = double crochet, ea = each, sc = single crochet

In this pattern, a shell = 5 double crochet all made in one same stitch.

Note: In this pattern, you will turn at the end of each row.

Row 2: ch 1, sc in ea of first 2 sc, skip 2 sc, 5 dc in next sc (one shell made), * skip 2 sc, sc in ea of next 3 sc, skip 2 sc, 5 dc (for shell) in next sc **, repeat the directions between * and ** 15 more times, then skip 2 sc, sc in last 2 sc.

To make a cluster: Keep the last loop of each double crochet on the hook, then, yarn over hook and pull that loop through all the loops left on the hook, chain 1 to close the cluster. This row uses clusters made of 2 double crochet and clusters made of 5 double crochet.


Row 3: ch 3 (counts as first dc), work a cluster of 2 dc over next sc and the first dc of the shell, ch 3, sc in ea of next 3 dc of shell, * ch 3, work a cluster of 5 dc over the last dc of shell, the next 3 sc and the first dc of the next shell, ch 3, sc in ea of next 3 dc of shell, ** repeat the directions between * and ** across until 3 stitches remain, then ch 3, work one cluster of 2 dc across next 2 stitches, dc in last dc.


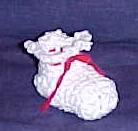
To make a cluster: Keep the last loop of each double crochet on the hook (in other words, do the usual steps in making a double crochet but do not do the last step; instead leave that loop on the hook). For a 5-dc cluster (as in the photo above), do 5 double crochet in this manner, leaving the last loop of each double crochet on the hook (as shown in the photo) then, yarn over hook and pull that loop (all at once) through all the loops left on the hook, next: chain 1 to close the cluster.

Note: The chain-1 to close the cluster does not count for any chains that you are instructed to make after the cluster. In this pattern, a chain-3 often follows the cluster, so you will do a chain to close the cluster then make 3 more chains to form the chain-3.

If you need further help with learning how to crochet a cluster, you may find it helpful to take a look at the How To Crochet A 2-dc Cluster (see link in Step 3). This spells out the full step-by-step instructions for making the cluster's double crochet stitches (with the last step of each not completed to leave that loop on the hook). The double crochet stitches would be made in the same manner for a 5-dc cluster.


Row 4: ch 3 (counts as first dc), work 2 dc in top of first 2-dc cluster, skip ch-3, sc in ea of next 3 sc, skip ch-3, * 5 dc in top of next cluster (shell made), skip ch-3, sc in ea of next 3 sc, ** repeat the directions between * and ** across the row, until 2 stitches remain, 2 dc in top of last 2-dc cluster, dc in last dc.


Row 5: ch 1, sc in ea of first 2 dc, ch 3, work one cluster of 5 dc across the next 5 stitches, * ch 3, sc in ea of next 3 dc of shell, ch 3, work one cluster of 5 dc across next 5 stitches, ** repeat the directions between * and ** across the row, then ch 3, sc in ea of last 2 dc.

Row 6: ch 1, sc in ea of next 2 stitches, skip ch-3, work 5 dc in top of next cluster (shell made), skip ch-3, * sc in ea of next 3 sc, skip ch-3, work 5 dc in top of next cluster (shell made) **, repeat the directions between * and ** across the row until 2 sc remain, then skip ch-3, sc in last 2 sc.

Repeat Rows: Repeat rows 3 - 6 as many times as needed, until you are within about 2 inches away from reaching the desired length, then continue with the directions for the last four rows. A suggestion would be to repeat rows 3 - 6 about 16 times, then see if the blanket is close to the length you want it to be.

Last Four Rows -
4th-To-Last and 3rd-To-Last Rows: Repeat rows 3 and 4 one time.

Next To Last Row: ch 1, sc in first two sc, ch 2, work one cluster of 5 dc over next 5 stitches, ch 2, * sc in ea of next 3 dc of shell, ch 2, work one cluster of 5 dc over next 5 stitches, ch 2 **, repeat the directions between * and ** across the row, until two sc remain, then sc in ea of the last 2 sc.

Last Row: ch 1, sc in ea of first 2 sc, * 2 sc in ch-2 space, sc in top of cluster, 2 sc in ch-2 space, sc in ea of next 3 sc **, repeat the directions between * and ** across the row, ending the row with 2 sc in the next-to-last ch-2 space, sc in top of next cluster, 2 sc in last ch-2 space, sc in ea of last 2 sc.
End off. Weave in ends.

Add an edging of your choice.

First Post - Remember the Kittens

This is my first post. I figured I'd share a free pattern that is popular called "remember the kittens". I hope you guys enjoy!! I'll post more free patterns as I find them.

"Remember the Kittens Afghan"


Adult sized afghan is approximately 45" x 64" But you can make it any size you wish by adding more or fewer rows.
This is my adapted version of the popular pattern - that I made up for my eldest sons graduation. Turned out really nice!

--------------------------------------------------------------

Preemie or newborn blankies
Use an F hook and sport weight yarn (something like Red Heart Soft Baby yarn) Ch 82 sts which makes a preemie size
or
G Hook and 106 sts for full term crib size
Work pattern until blankie is square.

-----------------------------------------------------------------------------

Adult sized amounts: Worsted weight, 4 ply yarn (Simply Soft works great!) : 16 oz light blue; 16 oz navy blue; 22 oz white. (I used light blue, navy blue and white.)
Size H hook

Instructions:
With Navy Blue, ch 164 --loosely
Row1: Dc in 4th ch from hook, dc in next ch; sk next 2 chs, 2 dc in next ch, ch 1, 2 dc in next ch, * sk next 3 chs, 2 dc in next ch, ch 1, 2 dc in next ch; rep from * to last 5 chs, sk next 2 chs, dc in each of remaining 3 chs.

Row 2:
Ch 3 (Counts as first dc of row), turn; dc in each of the next 2 dc, sk next 2 dc, work [2 dc, ch 1, 2 dc] in next ch-1 space [shell made]; * sk next 4 dc, work a shell in next ch-1 sp; rep from * to last 5 dc, skip next 2 dc, dc in each of the next 2 dc, dc in top of ch-3 at end of row.

[COLOR NOTE: TO CHANGE COLORS, WORK LAST DC TIL 2 LOOPS REMAIN ON HOOK; FINISH OFF COLOR BEING USED. WITH NEW COLOR, YO AND DRAW THROUGH BOTH LPS ON HOOK - COLORS CHANGED.]

Row 3:
With white, ch 3, turn; dc in each of the next 2 dc, * work a shell in ch 1-sp of next shell, work a puff st in sp between shells in 2nd row below as follows; [YO hook, insert hook in sp between shells in 2nd row below; YO hook and draw up a long loop to height of working row] 4 times [9 loops now on hook;] YO hook and draw through first 8 lps on hook [2 lps now on hook]; YO hook and draw through rem 2 lps on hook [puff st made]; ; repeat from * to last shell, work in a shell in ch-1 sp of last shell, dc in each of the next 2 dc, dc in top of ch-3 at end of row.


Row 4:
Ch 3, turn; dc in each of next 2 dc, * work in a shell in ch-1 sp of next shell; rep from * to last 3 dc, dc in each of the next 2 dc, dc in top of ch-3 at end of row.

(apparently there was a mistake with row 5 being a repeat of row 4. It was making double kittens? I have not tested this updated version but it should not repeat row 4)

Row 5-8: Change to light blue, rep rows 3-4. At end of row 8, change to Navy Blue.
*** (Please note that the shells and the puffs work through to both sides so even though it appears that you are working through the puffs on the wrong side this time, it still works.) ***

Rows 9-11: With Navy Blue, rep rows 3-5. At end of row 11, change to white.

Repeat rows 3-11 until afghan measures approx. 60" from beginning edge, ending by working row 10 [2 rows of navy blue]. Finish off and weave in all the loose ends. You can also add a fringe if you want to.